The basics that humans need to survive are food, water and shelter. The first two are easy to understand, but knowing how to build a shelter is a priceless skill to have at your disposal. The type of shelter you decide to make highly depends on what materials lie in your vicinity. Building a good shelter isn't just about stacking logs and leaves; it's about utilizing the resources around you, working with the terrain using materials specific to the area, and understanding basic survival principles. Read on as we look at three different shelter designs that require little to no tools while relying primarily on what Mother Nature has already provided.
The Lean-To Shelter
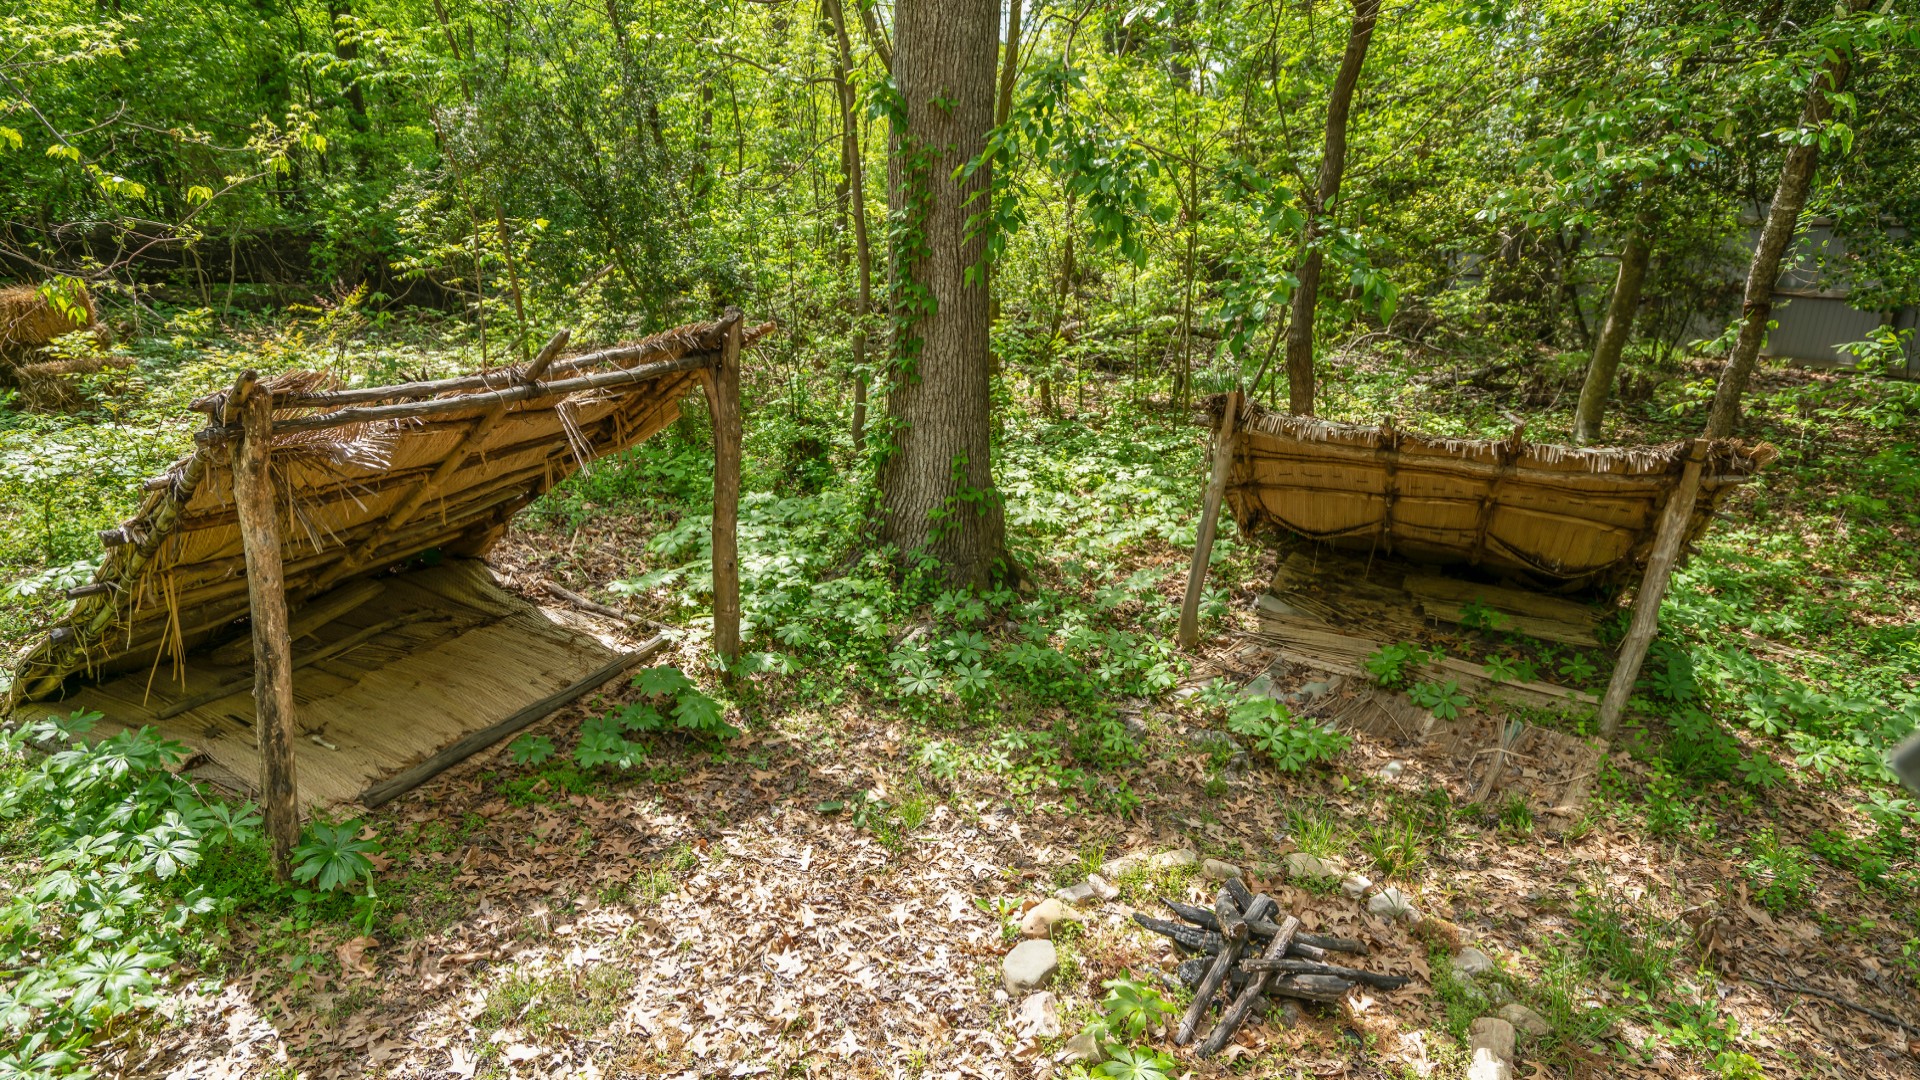
The lean-to (pictured above) is one of the most straightforward and efficient shelters you can build, making it an excellent option for beginners or those in a time crunch. Its simplicity lies in the fact that it requires minimal materials and can be constructed quickly. While a lean-to shelter works well in moderate climates and provides optimal airflow, it’s best for short-term use as it doesn’t offer full coverage from the elements.
The first thing you’ll want to do is gather materials for your lean-to. Begin by finding two trees around 6' or so apart from one another to serve as the support beams for your shelter. Be sure to avoid low spots, as these will pool water should a storm pass through. Look around for a long branch or fallen tree, which will be placed horizontally between the two trees to serve as the support beam. Next, gather a pile of small sticks and branches, which you will use to construct the wall.
Once you’re ready to start building your structure, you must lash your horizontal beam to the two trees you located earlier. You can use rope, shoelaces and even vines as lashing material. Once complete, lean the sticks and branches you gathered against the horizontal cross beam, angling them away from the wind to help provide stable protection against the elements. To further enhance the protective measures of your lean-to, you'll want to insulate the angular wall you just built. Gather up as many leaves, pine needles and other materials as possible and layer them along the entirety of the wall. Doing this not only insulates the shelter, but also makes it more resistant to rainfall.
The A-frame Shelter 
The A-frame is the perfect next step for those looking for something more robust than a lean-to. Its design provides better protection from wind and rain, making it ideal for more unpredictable weather conditions. It does take a bit more time to construct, but the payoff in durability is well worth the effort. Because of its closed-in design, the A-frame offers better protection than the lean-to. It's great for cold or wet conditions, but depending on the size you build, it may be a bit more cramped inside.
The materials you need for an a-frame shelter are the same as those you gather for a lean-to. Locate a long branch or fallen tree to serve as the center horizontal support while gathering smaller sticks and branches to serve as the walls. (Again, avoid building your shelter in low-lying areas that may be at risk for collecting water.) Next, prop your horizontal support against another tree, boulder or any other natural feature, as long as it is sturdy and not at risk of moving.
Once done, begin propping the shorter sticks and branches you collected along either side of the horizontal support to form the classic "A" shape of an a-frame shelter. As you would for a lean-to, insulate the side walls with whatever foliage, pine boughs or other materials you can find. The insulation you utilize, along with the shelter's shape, is an ideal combination for protection against wind and rainfall. For added comfort, you can gather a pile of pine boughs or other soft foliage and bring it "indoors" to construct a makeshift mattress.
 The Debris Hut
If you need a shelter to stay hidden or insulated from cold temperatures, the debris hut is your go-to shelter. This structure excels in keeping you warm and concealed and is considered ideal for survival situations and climates with harsher weather conditions. While it takes longer to build than a lean-to or a-frame shelter, the style of a debris hut combined with its insulated walls helps to trap body heat inside, providing more warmth and comfort to those within.
Like the builds mentioned above, you will first need to find a long, strong branch or fallen tree around 6' to 7’, give or take. Create your main support beam by propping it against another tree, boulder or other sturdy natural feature. Gather smaller sticks and line them alongside the main support beam to create the walls of your shelter.
Once the shell of your build is complete, it is time to make the entire structure seemingly disappear into the surroundings by covering it entirely with leaves, pine needles, twigs and other foliage. When it comes to how much debris to add, more is better. Not only is this essential to camouflage yourself, but it provides warmth and protection against the elements.
Lastly, you will need to construct a door to your shelter by weaving together smaller sticks and camouflaging just as you did with the main portion of your shelter with leaves, moss and other foliage. This door will be propped against the entry to your shelter for additional insulation and protection.
Knowing how to build a shelter in the woods can be a game-changer in a survival situation or even for those looking to expand their fieldcraft skillset. For shelter-building success, the key is to assess your surroundings, gather suitable materials, and work with what nature provides. Remember, practice makes perfect, so the next time you're out in nature, consider which option you would build and how you would go about it. When it comes down to it, the best shelter is the one you can make when you need it most. Happy building and stay safe out there!